Getting Started with Hoop Basics
Embroidery, a beautiful and timeless craft, offers endless creative possibilities. One crucial step in this journey is backing your embroidery hoop. Think of it as securing your creation for the best possible outcome. Embroidered pieces, whether intricate or simple, need a solid frame to hold their shape and prevent unraveling.
Why Backing Your Hoop is Essential
Backing your embroidery hoop isn’t just about keeping things neat; it’s essential for achieving a professional finish. A properly backed hoop provides several crucial benefits. Firstly, it creates a stable platform for your fabric to rest on and prevents stretching or warping. Secondly, backing helps prevent the fabric from shifting during stitching, ensuring consistent results.
The backing also reinforces the edges of the embroidery piece, preventing fraying and providing structure that will make your finished product feel more polished. A solid backing will help to even out any bumps or dips on the surface.
Choosing Your Backing Material
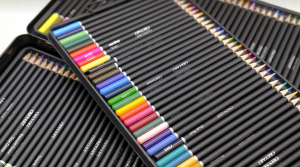
One important aspect of backing is selecting a suitable material. The right material depends upon your personal preference, the type of fabric you’re working with, and the desired effect. Let’s explore some popular choices:
Foam Hoop Backing
Foam hoop backing is an excellent choice for beginners and experienced embroiderers alike.
It’s lightweight yet durable, offering a good balance between stability and flexibility. It also prevents the fabric from stretching or warping due to its soft and resilient nature. You can use this material with almost any fabric type, making it a versatile choice for various projects.
Cardboard Hoop Backing
Cardboard hoop backing is another popular option known for its affordability and practicality.
This readily available material offers excellent support and rigidity. However, the surface of cardboard can sometimes feel rough or uneven, so ensure a smooth finish by sanding it down before using it.
Fabric Hoop Backing
Fabric hoop backing is ideal for beginners looking to develop their stitching skills while adding a personal touch to their work.
This option allows you to incorporate your fabric into the design by covering an existing base. It also provides the opportunity to experiment with different textures and patterns, adding creative flair to your embroidery piece.
Other Backing Options
For those who enjoy a bit more of a challenge or are seeking unique effects, there are other backing materials available for exploration:
- Cork: Offers a smooth and durable surface with good cushioning.
- Paper: A lightweight option that can be easily cut and shaped.
- Canvas: Provides a sturdy backing that can even be used for painting and other artistic endeavors.
- Leather: Adds an elegant touch to your embroidery work.
Backing Techniques: A Step-by-Step Guide
Now, let’s dive into the process of backing your embroidery hoop using a foam or cardboard backing. This guide provides detailed instructions on how to achieve a professional and even finish.
Step 1: Choose Your Hoop Size
Begin by selecting the appropriate size for your hoop based on the size of your fabric. Ensure that the hoop’s diameter aligns perfectly with the width or length of your fabric, which will help to create a seamless and consistent embroidery piece.
Step 2: Prepare Your Hoop
Carefully open the packaging of your embroidery hoop and remove any protective coverings. Ensure that the hoop is properly assembled and ready for use before proceeding. A clean and well-maintained hoop will contribute to a smooth and successful project.
Step 3: Attach Your Backing Material
Now, let’s attach the backing material onto your embroidery hoop. Use hot glue or fabric glue to secure it to the wooden frame of the hoop. Be sure to use consistent pressure for an even and secure bond.
Step 4: Secure Your Fabric
Once the backing is in place, carefully insert your embroidery fabric into the hoop. Make sure the fabric is evenly positioned and taut around the hoop’s edges before proceeding.
Step 5: Final Touches
For a polished look, trim any excess material from the backing or edge of the fabric. This final step ensures that your finished piece has clean lines and a professional finish.
Additional Tips for Success
Embroidery is an art form brimming with creativity, so feel free to experiment and personalize your projects! But remember to always prioritize using high-quality materials for optimal results. Here are some additional tips to keep in mind:
Use Sharp Scissors for Clean Cuts
Investing in a sharp pair of scissors is essential for any type of craft project, especially embroidery. It ensures clean and precise cuts that will help you achieve a professional finish on your pieces.
Practice Makes Perfect
Embroidery takes practice to master, just as with any artistic endeavor. Don’t be discouraged if your first attempts aren’t perfect. With time and dedication, you will develop your skills and create beautiful embroidered pieces.
Explore Different Techniques
The beauty of embroidery lies in its versatility. Don’t be afraid to explore different techniques and experiment with various stitches and materials. You can use this craft as a way to express yourself creatively.
Please let me know if you have any other questions.